Pomoč:VisualEditor/Uporabniški priročnik
| Opomba: Ob urejanju te strani soglašate z objavo vašega prispevka pod licenco CC0. Za več informacij glejte Strani pomoči v javni domeni. |
| VisualEditor portal |
|---|
 |
| General |
| O VisualEditorju |
| Pomoč pri zagonu |
| Če bi radi preiskusili VisualEditor ne da bi urejali članek, je na voljo tukaj stran kjer ga prosto lahko preiskusite. Na tej strani za uporabo VisualEditorja ne potrebujete računa. |
Odpiranje VisualEditorja
Začetek: VisualEditor opravilna vrstica
| Ko pričnete urejati z uporabo VisualEditorja, se na vrhu ekrana pojavi orodna vrstica. Vsebuje nekatere poznane ikone: | |
| Razveljavi in Uveljavi spremembe, ki ste jih naredili. | |
 |
Spustni menu Naslovi: omogoča spremembo ravni glave besedila (formata). Za spremembo nivoja poglavja, postavite kurzor na odstavek in izbereti element v menuju (besedila vam ni potrebno osvetljevati). Naslovi poglavij so formatirani kot "$format", naslovi podpoglavij pa kot "$subheading2", "$subheading3", itd. To change the style of a paragraph, put your cursor in the paragraph and select an item in this menu (you don't have to highlight any text). Section titles are formatted "Podnaslov", and subsections are "Podnaslov 1", "Podnaslov 2", and so on. Standardni format za tekst pa je "Odstavek". |
 |
Oblikovanje: klik na "A" odpre menu.
If you have not selected any text, then when you press the "A" to open the menu, and then select an item, that formatting will apply to the text that you start typing, from wherever your cursor is located. |
 |
Orodje za povezovanje: Gumb v obliki verige je orodje za povezovanje. Če kliknete nanj (običajno po izbiri nekaj besedila), se odpre pogovorno okno za urejanje povezav. |
 |
Spustni menu Vstavi citat menu: menu "Vstavi citat" se uporabja za dodajanje medvrstičnega navajanja (imenovanega tudi "opombe" ali "sklici"). Vsi projekti imajo dostop do formata navajanja "$basic" in možnost za "$re-use". Ta menu nudi tudi hitri dostop do lokalnih predlog, če so le te omogočene na vaši lokalni Wikipediji. |
 |
Navedi button: If the Citoid service and/or citation tool is enabled on your wiki, you will see a Navedi button instead of a Vstavi citat menu.
(Navodila za dodajanje lokalnih predlog za navajanje v menu Ročno za specifični wiki je na voljo v VisualEditor/Orodje za navajanje.) Instructions for enabling the Samodejno tab are available at Enabling Citoid on your wiki The citoid service tries to fill out citation templates automatically. |
 |
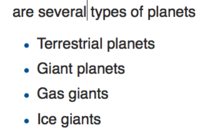
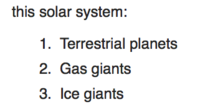
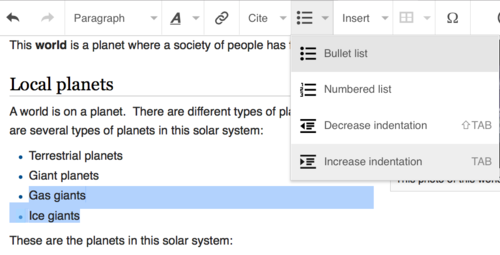
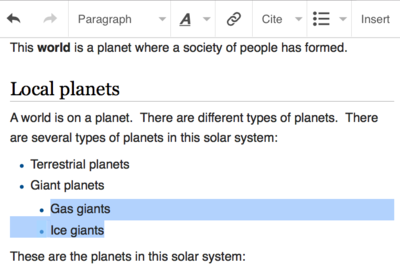
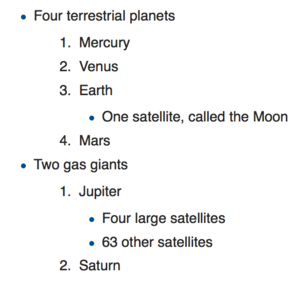
Seznami in zamiki: Prvi dve ikoni omogočata, da naredite Alinejni seznam ali Oštevilčen seznam. Zadnji dve ikoni omogočata povečanje ali zmanjšanje ravni zamika vsebine. |
 |
Predstavnost, sklici in vključitve: Vsaka ikona odpre namensko okno:
|
| Vrivanje posebnih znakov: Če kliknete na ikono "Posebni znaki" v menuju "Vstavi", se prikaže okno s posebnimi znaki. S klikom na določeni simbol, ga vrinete v besedilo. Ti posebni znaki vključujejo nekatere standardne simbole, naglase in matematične simbole. (Ta seznam se lahko lokalno prilagodi. Za navodila glej VisualEditor/Posebni znaki.) | |
| The Edit notices button displays any notices for the page. | |
 |
The Možnosti strani menu is to the left of the Objavi spremembe button and the Preklopi urejevalnik menu. On this menu there is a button to open an Možnosti dialog with the following (left side) tabs:
The tabs of the Možnosti dialog are also displayed in the Možnosti strani menu and can be opened by clicking on it. Furthermore the Možnosti strani menu contains the items Prikaži z leve proti desni or Prikaži z desne proti levi and the item Poišči in zamenjaj, which opens a bar, where you can insert words or regular expressions you are searching for and those to replace them with, together with several buttons for options. |
| The Preklopi urejevalnik button is next to the Objavi spremembe button. It allows you to switch to the wikitext editor. | |
Shranjevanje sprememb
Urejanje povezav
 |
Povezave so lahko dodane z "Povezava" ikono (ikona verige) v opravilni vrstici, ali z uporabo bližnjice Ctrl+K (ali ⌘ Command+K na Mac-u).
If you select (highlight) text and then press the "Povezava" button, that text will be used in creating the link. For a link that involves only one word, you can either select that word or just put the cursor within that word. |
 |
Pri uporabi gumba ali bližnjice se bo odprlo okno, v katero lahko vnesete povezavo. VisualEditor vam bo skušal pomagati pri notranjih povezavah (povezave na ostale strani Wikipedije) z iskanjem verjetnih zadetkov, ko začnete vnašati besedilo.
Pri tipkanju vam bo VisualEditor skušal pomagati z iskanjem notranjih povezav z iskanjem verjetnih zadetkov. Ko ste vnesli ali izbrali povezavo, lahko pritisnete ↵ Enter, kliknite izven polja, ali kliknete ikono za zapiranje (<). Vaša povezava se bo pojavila na VisualEditor strani, vendar ne bo potrjena, dokler ne shranite strani. |
 |
Če želite povezati spletno stran na drugem spletnem mestu, je postopek podoben: izberite zavihek »Zunanja stran« in v polje vnesite URL. |
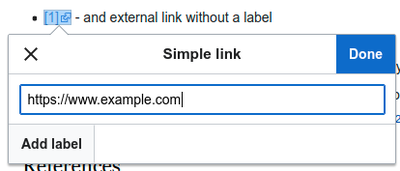 |
External links without labels look like this: [1]. You can add these by placing your cursor away from any word (e.g., after a space). Open the link tool by pressing on the button or pressing the shortcut keys. Type the URL in the box, and press the "Končano" button to insert the link. |
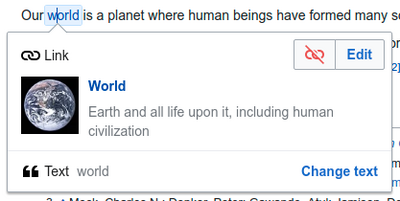 |
To change or remove an existing link, press within the text for that link, then press the "Povezava" icon that appears near it. The dialog will appear, for editing. You can also get to the dialog with the Ctrl+K keyboard shortcut. When a link is selected, it appears as blue framed.
Nato lahko uredite ciljni naslov povezave, ali pa jo popolnoma odstranite s klikom na ikono "Remove" (koš) v zgornjem desnem kotu okna. You can also open the link's target in another window by pressing on the copy of the link in the dialog box. (You might want do this to check if an external link is valid.) If you want to exit the link label (the text displayed as a link) or continue to write after this link, you can press →:
To edit the link label of an existing link, press within the link label and type the new one. But if you want to replace the entire label, please note:
|
Urejanje sklicev
- For further information, see Help using citation templates or Help using citoid's Samodejno tab
Determining which system is in place | |
| Your wiki may use one of three footnote systems. The one shown on the right is the simplest system, where the "Vstavi citat" menu does not include any citation templates. If your wiki uses this system, then everything you need to know about footnotes is on this page. |  |
| In the second system, you again start by pressing the Navedi button. Then a dialog box opens, which includes several popular citation templates set up for quick access in the "Ročno" tab. If your wiki uses this system, then you will find more details at Help:VisualEditor/User guide/Citations-Templates |  |
| In the third system, you again start by pressing the Navedi button. Then a dialog box opens, which includes an automatic citation process using the citoid service under the Automatic tab. If your wiki uses this system, you will find more details at Help:VisualEditor/User guide/Citations-Full |  |
|
Urejanje obstoječih sklicev | |
| To edit an existing reference, press on it where it appears in the text (usually as a bracketed number). You will see either a "Sklic" icon (bookmark) or an icon (and name) for the template that was used to create this reference. In either case, pressing on the "Uredi" button will open a dialog where you can edit the reference. |  |
| For the "Sklic" icon, pressing "Uredi" opens the reference dialog. To start changing the reference information, press on it.
Veliko wikijev uporablja predloge za oblikovanje sklicev v skladu s posebnim standardom. To boste opazili ob urejanju obstoječih sklicev, katerih vsebina se obarva modro, ko jo izberete. If a template was used and you press on the reference information, then the Predloga icon (puzzle piece) will appear with some information. Press on the "Uredi" button to edit the content of the template in the template editor dialog. |
 |
| If what appears when you press on a reference is an icon for a standard template for citations (an example is at right), then pressing "Uredi" will open the template editor dialog. |  |
| Inside the template editor, you can add or remove types of information or change current content. Only fields (template parameters) that have content will show, initially. To add fields, press on "Dodaj" at the bottom of the editor. |  |
| Ko končate, kliknite na "Shrani spremembe". | |
Ponovna uporaba obstoječih sklicev | |
| If the page already contains a citation that applies to the text you want to source, then you can choose to re-use that existing citation.
Da bi ponovno uporabili obstoječ sklic, postavite svoj kazalec na mesto v besedilu, kjer ga želite dodati. Nato kliknite na ikono "Reference" (zaznamek) v opravilni vrstici. (Note: If your wiki has the second or third footnote system described above, you'll see a "Ponovna uporaba" tab, in a dialog, instead of a "Uporabi znova" item on the "Vstavi citat" menu.) |
 |
| Če obstaja veliko sklicev, lahko uporabite iskalno vrstico za prikaz sklicev, ki se ujemajo z danim besedilom. |  |
Dodajanje novega sklica | |
| Da bi dodali nov sklic, postavite kazalec na mesto v besedilu, kjer ga želite dodati. Nato kliknite na ikono "References" (zaznamek) v opravilni vrstici. Then click "Osnovno". |  |
Using the "Osnovno" citation | |
| Shown here is what you will see if you select the basic references item. V urejevalniku sklicev lahko dodate, urejate in oblikujete vaše navedbe.
Lahko določite, da sklici pripadajo določeni skupini; to se uporablja za prikaz skupin sklicev z orodjem "References list". |
 |
| Če dodajate nov sklic in hočete vanj vključiti predlogo, kliknite ikono za vstavljanje (kos sestavljanke) v orodni vrstici urejevalnika sklicev. |  |
| Nato poiščite predlogo, ki jo želite uporabiti. Dodajte in uredite jo, kot bi uredili že obstoječo.
Kliknite na "Apply changes" za vrnitev v urejevalnik sklicev. Ponovno kliknite "Apply changes" za vrnitev na stran. |
 |
| Če na strani še ni seznama sklicev (na primer, če dodajate prvi sklic strani), ga je potrebno dodati, da bo besedilo vašega sklica prikazano.
Postavite kazalec na mesto, kjer želite prikazati sklice (ponavadi na dnu strani), in kliknite ikono "References list" (tri knjige). |
 |
| Če ste ustvarili skupine sklicev, lahko v tem oknu določite skupino za selektiven prikaz sklicev, ki pripadajo skupini.
The final step in the References list dialog is to press "Vstavi". |
 |
Using standard cite templates | |
| Your local wiki may have added extra citation templates to the "Vstavi citat" menu. If so, you have quick access to the most-used citation templates for your wiki. (Instructions for adding extra citation templates to your local wiki are available at VisualEditor/Orodje za navajanje.) |  |
| Pressing on a template icon such as "Cite book" will take you into the template editor for that template. Important information fields may be marked with an asterisk. While the most common fields will be shown, not all of them are required. |  |
| To add more parameters, scroll down in the template editor and press on the "Dodaj" option.
Press on "Vstavi" when you are done. |
 |
Editing images and other media files
Uploading images
Editing media galleries
Editing templates
The powerful MediaWiki template system lets you insert dynamic content, text from other pages, and much more. For a detailed explanation and examples, see the Templates help page.
In the VisualEditor you can search for a relevant template, add an invocation or transclusion on the page you’re editing and, if needed, add custom content using parameters.
Insert new template
| Da bi dodali novo predlogo na stran, postavite kazalec na mesto, kamor jo želite vstaviti, in kliknite na ikono za vstavljanje (kos sestavljanke) v opravilni vrstici. Then open the Vstavi menu and select " |
 |
| Find the template you want to insert by typing either its name or a relevant keyword. Results containing the search term in either the name or description will display in a dropdown. This should help you find a relevant template, even if you don’t know its exact name.
If you’re having trouble finding the kind of template you want by using keywords, you can look on other wiki pages with similar content and view or edit the page source to see which templates are in use. When you find the desired template’s name, you can type it into this field to insert it here. |
 |
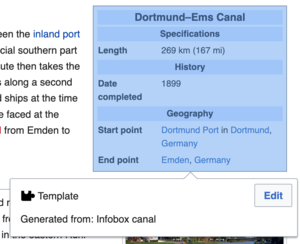
| You can also edit a template that’s already on a page. When you select the template you want to edit, it turns blue, and a box appears displaying " |
 |
| Some templates are not visible to someone reading a page. In the visual editor, such hidden templates are still shown so that you can click and edit or delete them. The name of the template will be shown next to the puzzle icon and both will be grayed out. |  |
Template parameters | |
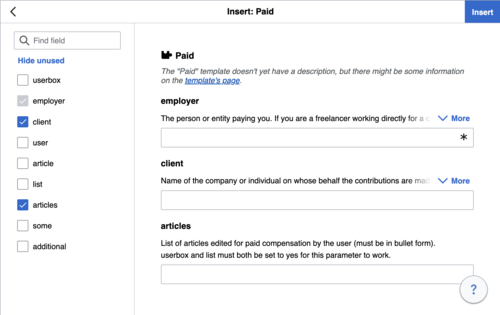
| You’ll see this dialog box when you’re adding a new template or editing one already in place. What you see in the box depends on whether the template in question contains TemplateData, helpful metadata added by other editors to make it easier to edit templates in the Visual Editor.
When a template contains TemplateData, the VisualEditor can use it to present annotated fields for you to fill in.
|
 |
| You can disable any optional parameter (which have blue checkboxes on the left side). If a parameter’s checkbox is grayed out and not clickable, the template requires that parameter, so it can’t be disabled.
When you insert a new template, you may find that some optional parameters are pre-selected. That means the author(s) of the template recommends the use of those parameters. It’s best to review all parameters that will be used in a template to ensure you understand their use. Clicking an unchecked parameter adds it to the template. Clicking a parameter that’s already been added takes you to the parameter’s input field. Some template parameters will show as “deprecated”. Don’t use deprecated parameters when inserting a template; they’re only visible to you because those parameters are in use on older pages where this template was included. |
 |
Adding undocumented parameters | |
| If you’re inserting or editing a template whose author hasn’t laid out its parameters in TemplateData, it has what we call “undocumented” or “unnamed parameters”. In these cases, you should consult the page for the template itself. There you can learn how to correctly employ and work with all of the template’s parameters. This includes learning the exact names of the parameters as written by the template author.
If you find in the documentation that the template expects parameters without names, fill in numbers as placeholders for the parameter names using the undocumented parameter input, then add text to the values you want to provide as you normally would. Example:
If you accidentally include nonexistent, misspelled or erroneous parameters, the values you enter for those parameters won’t show up on the page you’re editing. |
 |
Autogenerated parameters | |
| In this example, the template in question lacks TemplateData but it was possible to autogenerate the parameters. This means that the undocumented parameters have already been added for you, but the names may not be easily understandable and the dialog cannot display any directions or descriptions. As a result the dialog box provides a link to the template’s documentation, which should help you deduce and fill in the template’s various parameters. |  |
Editing multi-part template content | |
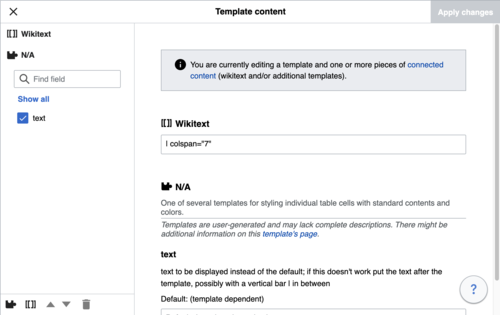
| During editing, you may open template content consisting of multiple templates or a single template linked to some wikitext. This differs from the nested templates described below. In this case, the templates are better visualized as being stacked or connected.
This content often contains “unbalanced templates,” templates which are incomplete on their own and need to be paired with some wikitext or another template in order to function. These related pieces of template content must be created in wikitext, but can be edited in the VisualEditor. In these cases you will see a notice at the top of the dialog to signal the situation and a specialized toolbar will be visible at the bottom of the sidebar. There you can use the icon buttons to add additional templates, additional wikitext, delete elements or change their order. |
 |
Nested templates | |
| Templates can include other templates as the value for parameters. You’ll recognize it when you see a parameter whose value contains the double curly braces ( {{ }} ) denoting a template.
The VisualEditor can’t present this template within a template (a nested template) using the editor’s easy-to-use interface, so if you want to nest a template yourself, you’ll need to understand how to add the template by hand in wikitext into the appropriate parameter field. |
 |
Completing your edit | |
| When you have finished editing a template, you can click "Shrani spremembe". Then you can preview your edit and make sure it looks the way you want and expect.
You may also see an error message, which (like the other TemplateData mentioned above) is community-provided content and may vary in usefulness. You may need to consult the template’s own documentation to get to the bottom of some errors. If you’re still having trouble, consider posting about your problem on the template’s talk page. |
|
Removing a template | |
| To remove a template in the VisualEditor, click the template box. Press the "Delete" or "Backspace" key on your keyboard. The template will disappear from the page. |  |
Editing on mobile | |
| When editing a template on a page using the VisualEditor on a mobile device, you’ll see that the sidebar starts out hidden. You can make it visible by pressing the “Show/hide options” button. |  |
Zamenjava predloge | |
| When you insert a template in a wiki page, its content and appearance are reevaluated every time the page loads, based on the template code and the values of its parameters. This means if someone updates the code of a template, then every page which uses that template will also get updated when they publish.
There’s another, much less common way to use templates, though, and that’s to substitute a template. Doing this permanently includes the template content just as it appears at the moment you insert it. It will not update if the template code is later changed. Most users won’t ever need to resort to substitution. Substitution is typically only useful when you need to capture the exact appearance of one version of a template, such as when content is under development and needs evaluation. To substitute a template in the VisualEditor, insert a template using the name syntax When you’re finished, press “Vstavi”, which will insert the template content as you see it. |
 |
Editing lists
Editing tables
Urejanje kategorij
 |
To edit categories, on the "Možnosti strani" menu, press the "Kategorije" item. |
 |
Gumb "Kategorije" odpre okno, kjer je seznam obstoječih kategorij. V tem oknu je mogoče dodati nove kategorije.
You also have the option of setting or changing the general (default) sorting key, which determines where the page appears when listed with other pages in the same category. For example, the default sorting key for the article "George Washington" is "Washington, George". In the category "Presidents of the United States", the article is listed under the letter "W", not the letter "G". |
 |
To add a category for a page, type the name of the category into the field "Dodaj kategorijo". As you type, the visual editor will search for possible matching, existing categories. You can either select an existing category, or you can add a category that doesn't yet have its own category page. (Until that category page is created, your new category will show as a red link after you publish all your editing changes.) |
 |
Da bi odstranili že obstoječo kategorijo, kliknite na njo in nato izberite ikono "Odstrani" (koš za smeti).
Pressing on a category also allows you to specify a sorting key for that specific category. Such a sorting key overrides the default sorting key. |
| Ko končate z urejanjem, kliknite "Shrani spremembe" za vrnitev na urejevalca strani. | |
Editing page settings
Editing maps
 |
You can add and change maps. See Help:VisualEditor/Maps. |
Editing mathematical formulae
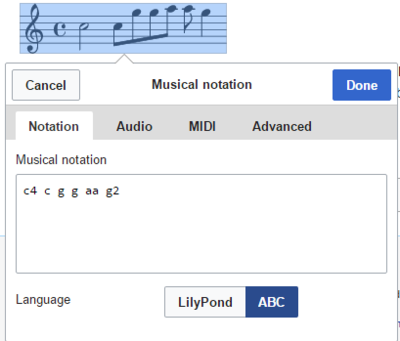
Editing musical scores
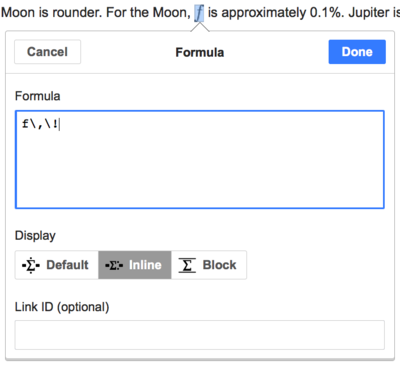
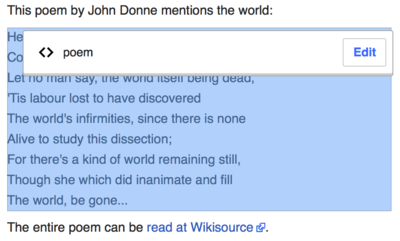
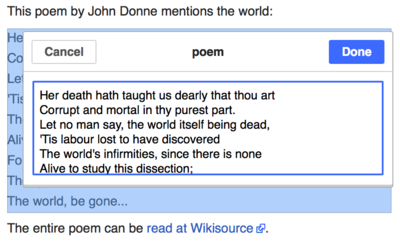
Urejanje matematičnih enačb in drugih posebnih elementov
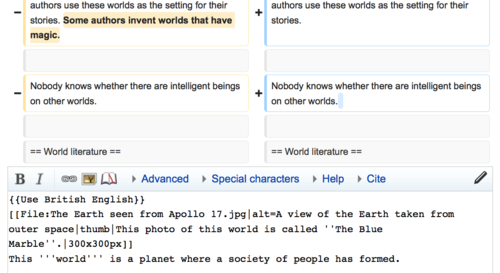
Switching between the visual and wikitext editors
Bližnjične tipke
Veliko urejevalcev je navajenih na neposreden vnos wiki besedila, še posebej krepak tisk, poševen tisk in wiki povezave. Bližnjične tipke omogočajo hitro vstavljanje pogostih oblikovanj brez uporabe orodne vrstice. Pogoste bližnjične tipke, ki so podprte v VisualEditorju in ostalih urejevalnik, so:
| Bližnjica | Rezultat | Mac bližnjica |
|---|---|---|
| Ctrl+B | Krepko | ⌘ Cmd+B |
| Ctrl+I | Poševen tisk | ⌘ Cmd+I |
| Ctrl+K | Vstavi povezavo | ⌘ Cmd+K |
| Ctrl+X | Odreži | ⌘ Cmd+X |
| Ctrl+C | Kopiraj | ⌘ Cmd+C |
| Ctrl+V | Prilepi | ⌘ Cmd+V |
| Ctrl+Z | Razveljavi | ⌘ Cmd+Z |
Also see the full list of all keyboard shortcuts.


